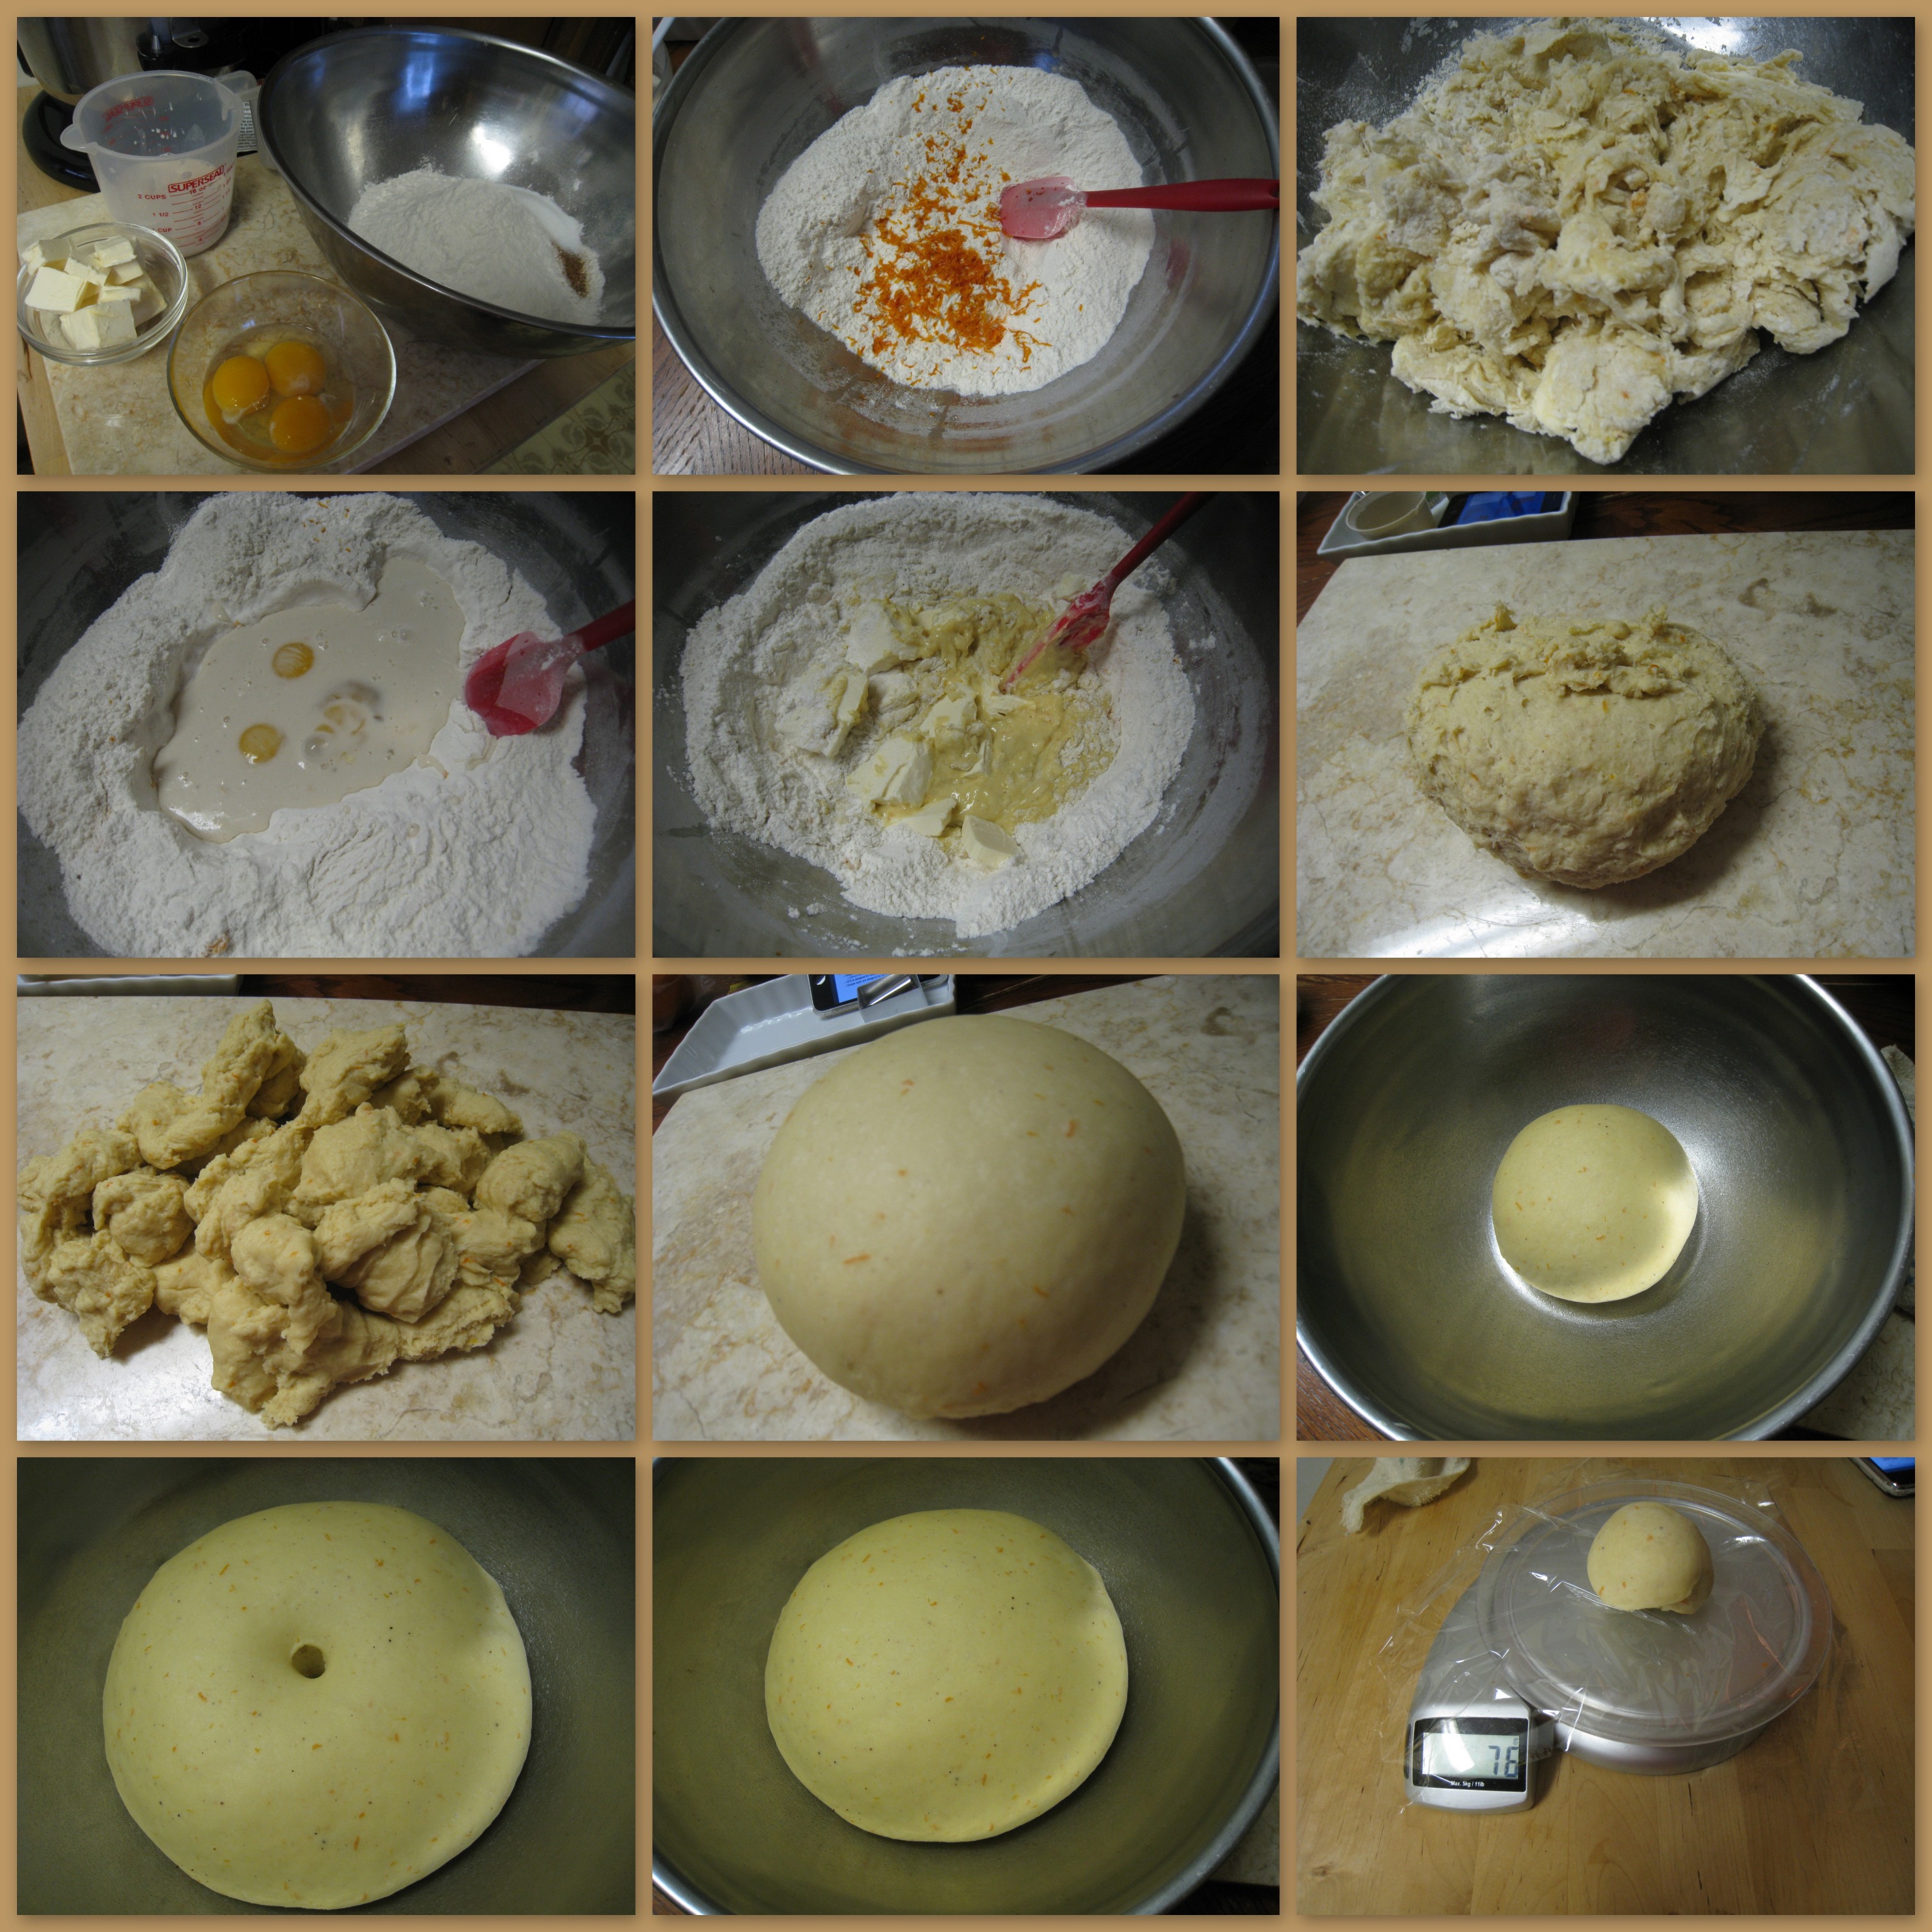


Making of Berne Brot Dough

Middle Eastern flat bread - with a LOT of sesame
Much improved pressed down pattern. I had to press the bread 2 times to get this effect. This is pretty easy dough to knead and don’t need any egg. Maybe I can finally make vegan bread ;-)

Very basic ingredients for Middle Eastern flat bread
I used multi grain flour thinking it may work better with sesame. Actually I keep it just basic white flour would have shown the subtle sesame favour a lot more. But at least this is a “healthier” version. I have I have too on too much EVOO on the parsley & thyme topping.

EVOO, parsley and thyme topping on Middle Eastern flat bread
Done baking. A bit disappointed the neat pattern I have spent so much time to create is not really showing.
")
Middle Eastern Manakeesh Bil Za’atar (minus Za'atar)
My most favourite shot. The neat quilted look.

Lovely quilted bread look

Mexican Conchas
Mexican conhas is actually very similar to Hong Kong’s pineapple buns. There is a thin buttery, sugary crust cover plan basic white bun. You can get fancy and put in sweet filling like red bean paste. But the basic bun allows you to serve with a “slice” of butter in a middle of toasted warm conchas. It tastes good but not necessary good for you ;-) Hey you need to spoil yourself every now and then.
Started with neatly and evenly created a dozen plan white little buns (I have followed Bread Bible advice from Rose Levy Beranbaum. She suggested adding a couple tablespoon of whole wheat flour to plan white to enhance favour. That really does work, you cannot taste whole wheat but the plain white bread feels earthier)

Plain Bun in the Bottom
The sugary crust – yes, I think i was a bit too heavy with green colouring. Next time I will not put in as much. Probably will try orange too.

Sugary Crust on for the Top
Cut a round top and place on top of the white bun. Very simple to make! Cut a little weave pattern to make it more interesting.

Pretty but Delicate Topping
This is a simple, rusty looking bread that’s actually not easy to make. The kneading process is extremely sticky and messy. The result product is more dense & filling bread. It has nice bite because of the corn meal.

Bros - Portuguese Corn Bread
Started with cooking the cornmeal for a short time

Cooked Cornmeal
Still look manageable in the beginning, but it came awful sticky messy in just sounds …

Messy Kneading Time
Just before baking, heavy dusted with flour and score the top

Broa - Before Baking
Made two loaves from this recipe

Ready for Baking
After 25 minutes baking in steamy hot oven. Cooling time on a cooling rack

Cooling Time

A little unexpected shape & form eh? Yes, this is not your usual round puffy looking an-pan. I have seen some google image search call this style “yaki-an-pan”. The bread is actually still very soft. Even this bread is made with tofu, you really cannot taste that, so don’t worry if you are afraid of tofu. The taste is very very subtle. The tofu provide a lot of moisture to this dough. Yes, it is a very stick mess to knead but fun! The best is without additional fat from butter, this bread still remain soft and tender after a couple days.
Humm… I have forgotten which geek video I was watching. Should be related CSS / javascript optimization.

Still look like your normal an-pan now…

Here is the trick! cover the bun with silicon pat(smooth side touch the buns). Then put another baking sheet on top. Heat from top and bottom will nicely brown the bun on both side and ..

And you end up with disk look

I have extra dough, so put the rest in cube bread box and end up with basic lovely tofu toast


Now thinking back, I must have tried to make similar bread on my own with bread machine before. My own recipe was a bit off that it did not turn out as buttery and soft as Chef Marco’s recipe. This is very very sticky dough to knead by hand. But it is actually not too hard to knead if u don’t mean the sticky feeling all of your hands. The trick to fluffy soft texture that last for days is tangzhong (water-roux) method. Instead of using special chemical, this is a all natural way to bust up water content resulting in lasting softness. If you are interested to try out on your own, you can check out recipe from this blog. It has very detail steps and good explanation.
All ingredients (minus the butter)

Very sticky dough, the plastic scarper is a MUST-HAVE tool to work with this sticky mess

After kneading for a while while gluten developed, add in the butter and continue to knead. Even it is sticky, it feels good to knead this buttery dough!

Made 5 baby size loaves and a tiny cube bread. LOVE that square bread box!!

After light brush of egg-wash on top, there is secret special ingredient added to make sure the milk toast keep is beautiful shape. Can you figure out what’s the special secret ingredient?

Beautiful texture eh?

Any developer probably must have stumble on to stackoverflow site to find answer common programming question. This is pretty cool Google tech talk about that site from the creator(Joel Spolsky). Very good speaker.

This is first of my weekly bread challenge. I was extremely impressed by the look & smell of this bread. At first I couldn’t find the instruction on how to braid the bread. As I was about to give, I find this extremely useful blog post explain this with detail pictures step-by-step guide.
Started with a bit of kitchen gadget!! So much less work to zest lemons & oranges now!!

Also bought 5 kg of bread flour! Good workout because I was carrying them on my backpack and taking Canada Line home from Richmond.

I put in too much sugar with yeast in my first try to wake up the yeast so u see dead one. So I retry without sugar and result in happy living yeast (one with bubbles) .


My best kneading buddy – iPad playing Google Tech Talk (JavaScript the Good Part by Doug Crockford). Notice the rectangle ceramic dish, is the best (and cheapest) iPad stand! I bought for only 99 cents from kitchen supply store in Richmond (close to Aberdeen Centre)

Here is personal little tip to knead bread in a small kitchen without proper counter space. I finish the sticky mixing process in my largest mixing bowl first. Then transfer it to my marble board. It is so much neater and easier to handle! Highly recommend getting a full set of stainless steel mixing bowls and marble board. They are must have items in a kitchen!! BTW, notice my sticky hand! I DID knead by hand this time!!

Here is any probably special (but some may say odd) kneading trick I use. To make sure the entire dough it evenly and completely kneaded, I break up the dough into smaller trunk, then toss the chunks around and knead the pieces back together. It does tak longer, but it works!

Done!!! Kneading my first brot!! Well I did hand kneading before but it is a low smaller portion with softer and easier to knead dough.

After first rise, ready to cut out into 6 even size portions. Check out the cut look. Looks pretty eh? Another must have for anyone serious about baking is digital scale. Extremely handy to measure ingredients accurately and


Ok, rolled to strings… but something looks wrong, how come the strings are so thick?! So I double-check the recipe and oops, that recipe should yield two Swiss Berne Brot, I should have cut in 12 pieces. No problem, just more rolling to stretch out the string and cut in half

Ready for braiding!!

Almost done …

Just flip and tuck and yeahhhh my first Winston knot!! Well actually my 2nd because I completed one during the class but frankly I had no idea what I was doing.

Done two and put in my daiso bread box and put into the fridge for cold ferment


The next morning took it out of the fridge and let it return back to room temperature and wait until they double in size.

Looking too plain.. so added poppy-seed, much prettier eh?

Done baking!!

Taste testing and check out a lice of the beautiful bread

Made this bread while watching:
 034")
I really love my previous French Mousse Cake Course, so I have to go back to Pastry Training Centre of Vancouver more baking course! This time is artisan bread (Bake Around the World – Ethnic Breads). I do frequently bake bread but I usually take a lazy short cut using my bread machine to make the dough and I shape and bake it in the oven. The resulting bread normally turn out OK but does not taste that great. Just like the French Mousse Cake Course, this intensive course covered a lot of recipes in the short eight hours. Highly recommending anyone who is very serious about making high quality bread. You definitely should to take the whole set of courses not just this one. The reason why I decide to only take one it because I notice at there is one kind of bread that I don’t have to knead. I don’t think my body can handle so much kneading. Even doing just half (maybe less than half) of kneading, that was enough to give me “ab workout”. Apparently the way I knead does require ab muscle! Ha, bread machine is like full body workout for me.
The above pictures was taken on day 2 of the course from Chef Marco’s table (that’s why all the breads look so perfect and pretty). See the picture below the breads we complete on the first day after only four hours.
Here is the complete list we have covered

Just like French mousse cake course, I am committed to recreate and practice all the recipes at home. Better yet, I have decided to make use of the kneading time to learn something. So I am pairing each bread making with at least one session of Google Tech Talk Video. With sticky dough on my hand, I just cannot stop the boring geek talk (at time there is unbearable speaker and really boring topic.. but most of the time it has been informative and interesting!)
